Showing posts with label Dyeing. Show all posts

Tuesday, April 2, 2013

Remembering a Fall Workshop with India Flint


I want to share some photos from the workshop I took last Fall with India Flint.  It was held at a old elementary school that has been repurposed as a community arts center for a beautiful lakeside suburb of Cleveland Ohio.  Many of the other women in attendance were incredible artists in their own right, and India – well she is genius- with a wealth of information absorbed after years of careful observation- patiently gathering, and feeding the dye pot.

When you see a piece of dyed cloth labeled "eco-print", no doubt it was inspired by her technique. What I would recommend if you want to learn her techniques is that you get a hold of her book and/or take a class with her. I don’t want to dilute the experience by giving you a blow-by-blow account of the workshop. As I work out ideas in my own backyard I’ll share what I come up with.

With sensitivity to India’s wishes I’m not including images of her. Just a few highlights…walnut bundles, fabrics tightly bound around branches, fantastically colored dyed goods blowing in the breeze- so you can get a taste of how magical the time was.


Some of my samples that I brought home


Nugets to remember...
Get to know what is in your own back yard.
Bundle- warp- and tie tightly- firm contact is important.
Be patient- it takes time.
Experiment with non-toxic mordants like soy milk and egg.
Use found rusty objects to print and alter colors.
(Rubbing fabric on an old copper foot plate made the prints on one of my scraps pop to life!)

Leaving you with this scrap of wool with what turned out more like oak leaf resists than prints- left after being wrapped around a walnut and simmered. It wasn't a particularly beautiful sample but I thought it deserved saving. It doesn't show up well in the photo, but the veins in the leaves left an interesting relief print in the soft wool, giving it some interesting texture.


I’ve embroidered around the leaves and added some applique shapes made from the silk I used to wrap my Easter eggs in last weekend. I'm going to add some more embroidery to this – a spiders web I think-connecting the Fall leaves and Spring buds and representing a dream catcher of sorts. I will be dreaming of ways to experiment with what I learned from India far into the future.


Saturday, March 30, 2013

Celebrations and Natural Egg Dying


It’s Easter weekend - the Chickens are celebrating their one-year anniversary, and so I wanted to do something extra special in the way of egg dying this year.


Munching on new grass shoots-fat and happy- and one year old 

Last Fall I had the amazing opportunity to take a workshop with India Flint author of  Eco Colour – Botanical Dyes for Beautiful Textiles.  So much magical information to digest and process-It’s been months and I’m still percolating ideas. I realized I never shared photos so will soon- promise.

In the introduction to her book India shares that it was experimenting with Latvian egg dying traditions using eucalyptus on cloth that led her to discover the eco-print in 1999. So inspiring- the beauty of humble materials transformed through the alchemy of heat and water- an ancient tradition being passed down and then so beautifully expanding upon. You can peek in on India’s journeys and artistry here.

Tucked into the pages toward the back of the book is her recipe for Dyeing Easter Eggs in the Latvian Manner.


Here is what I did-
I stashed away onionskins for a number of months and then last week I shamelessly stuffed skins from the bins of our market into plastic bags in full sight of other normal shoppers because I didn’t feel I had enough.
I purchased a few green herbs (flat leaf parsley, baby arugula, fennel, which proved a bit too fine leaved) at the market- since my garden is still very much asleep.
Then proceeded...
Lay a leaf on an egg
Wrap the egg in onionskin


The bundles are almost as interesting and fun to look at as the finished eggs

I also wrapped my eggs in strips of fabric (wool and silk) bonus bits to use for embroidery latter)
Bundle and tie off snuggly (I used silk floss shared by our workshop hostess Christine-also a gifted fiber artist.

Layer onionskins in a pan
Put bundled eggs on top
Add more onionskins 
Cover with water
Bring to a boil and then simmer gently for 10 minutes
Let the eggs cool – unwrap and be amazed!


Saturday, October 6, 2012

Heading Out On An Adventure


A few months back I spent some time playing with a sampler box of exotic dyestuff. At the same time I was reading a wonderful book about Navajo weavers that included stories of hunting for the roots and bark that were used for traditional colors. I tried the dyes in my sampler box then gave Queen Anne’s Lace (which was running rampant across our back fields) a try and ended up liking it best. I quickly realized that what truly excited me about my initial experiments with natural dyes was the possibility of producing beautiful colors from the plants and trees growing right in my own back yard.

I started scouring threads on Ravelry related to natural dyeing.

I stumbled upon Grackle and Sun and Whatzitknitz - two blogs I love to visit now because of the  generous way these fiber artists share their discoveries.

Somewhere in my surfing I heard there was a workshop being offered by the talented fiber artist and author India Flint, and everything- the timing- the location- and the funds came together so that I will be able to attend.

India has developed a process she calls “Eco Printing” which she writes about in her book of the same name. Her process involves bundling the dyestuff in fabric and then processing the bundles in various ways. She focuses on regionally available materials and gathers them responsibly- often using windfalls. She avoids poisonous mordents and embraces the fact that some of her color and prints may not be fast.


Walking out back I noticed we have a shrub that was just covered with small dark purple berries.  When crushed the juice was inky purple. I asked a friend of mine who is a horticulturalist to help me identify it. He told me it is called “Common Buck Thorne”. He also mentioned most people consider it a weed shrub.  Well I guess my taste leans toward a love of weeds because I think the shrub itself is pretty attractive.

I decided to do a little playing around with the berries. I soaked an old natural colored cotton/linen shirt in vinegar- gathered a bowl of the Buck Thorn berries and some other leaves- mostly wild grape- and some goldenrod flowers. I arranged them on the shirt- rolled it up- tied it up -and let it sit a few days. When I unrolled it color had transferred to the shirt in really interesting ways. The photo doesn't really do the subtle color variations justice.


I’m really excited to be able to work with India and the others gathering for her workshop. I have been preparing my supplies and packing- ready to head out tomorrow.

I am taking twenty pieces of fabric – a mix of wool and silk. They needed to be labeled so I cut little patches from a favorite old and very worn cotton shirt. I printed the patches with a monogram stamp I carved. Then I sewed them on my fabric samples with various colors and stitches.


I noticed after I cut up my shirt that I was left with the pockets and the button bands.  We are to bring a nametag so I got the idea to sew my pockets together and use the button bands to go around my neck. Then I decorated it with a patch stamped with a face and added my name.  The pockets sewn together actually form three pockets and it seems like it will be a handy place to stash my iPod- or glasses or a little notebook and pencil.


I’ll be back home midweek. Then I touch down and regroup to head to Wisconsin for a work related conference.  It will be a busy but fun week and probably a little quiet on the blog. I’ll catch up with you latter-


Friday, August 3, 2012

Adventures In Natural Dyeing- Staycation Wrap Up


My vacation time really became a mini immersion course, dyeing and simmering and reading... I poured over Van Stralen’s “Indigo, Madder and Marigold” and devoured Gladys Reichard’s  “Spider Woman”.

Reichard was an anthropologist who went to live with the Navajo for four summers during the early 1930’s. She was studying language, family structure, religion and symbolism and did that by apprenticing herself to a family as a student of weaving.


“I was interested in crafts and decided that learning to weave would be a way of developing the trust of the women, as well as of learning to weave and to speak the language. By this attempt I would put myself under the family aegis; my work would at first deal primarily with women, and I could observe the daily round as a participant, rather than a mere onlooker.” P.xii, introduction to “Spider Woman”.


The Navajo don’t have a word for teach – they show- and Reichard surprised the woman with her willingness to learn. I love Reichard’s descriptions of the Southwestern sky- often comparing the clouds to tufts of wool. I love the glimpses into ordinary activities- like the winding of a ball of yarn-the women wrap the wool in just two directions not around and around like we do. Reichard  is always struck with the calm, efficient and practical way the Navajo approach their work.

“ We have nothing further to do but wait, and as we sit in the pleasant sunshine and watch I am once more overcome with the casualness of it all. I have at home repeatedly tried dyeing; I have always tried to follow written instructions to the letter; I have invariably achieved only streaked results. Marie has here done only the most essential things. The wool has not been washed; I am soon to find it will not be rinsed- the dying suffices for cleaning and coloring. Verily Navajo ways are not our ways. Occasionally Marie stirs the yarn and lifts it to test the color. Too light, not even, she lets it boil longer.” P. 54 “Spider Woman”


Vacation is over but I plan to continue my exploration of natural dyeing and of Navajo rug making. I’ve already sent off for a book that my friend Katie recommended... 


and ordered Reichard’s book “Weaving a Navajo Blanket.” I am also looking forward to getting a hold of-


because I’m finding the historical significance of dyeing so interesting.

And someday- because I think it’s fun to dream big- I’d like to do this.

“Most of the women have refinements of their own as well as their secrets, but the essentials are the same. Most weeds yield yellow, and wevers use the kinds nearest home.” P 273 “Spider Woman”

Photo by my sister Nancy

Inspired by Reichard’s word’s and remembering that I had read that you could dye with Queen Anne’s Lace , and knowing we have A LOT of Queen’s Ann’s Lace out back- I decided to give it a go.

Though many people consider it a weed, Queen Ann’s Lace really is quite pretty when you take time to look at it . I have to admit that I had never noticed how the opening flowers resemble a nest.

All that was necessary was about a half bucket full of flower heads. Then I covered them with water and let them sit overnight. The next day I simmered the flowers and water for an hour, then let the mixture cool a bit before straining the bath through some muslin into another bucket. I then added my dye bath to a large pan, added alum mordanted wool and simmered it for an hour.


There was really no discernable fragrance with any of the other dyestuffs I used from my kit.The Queen Anne's Lace was different.
The fragrance as the dye bath simmered is difficult to describe- it smelled something like what honey tastes like- a sweet and flowery fragrance- I can’t say I’ve smelled anything like it before- now even after washing the yarn has retained a little of that fragrance. 


I’m in love with this color – it’s yellow – but it’s not- not really chartreuse- I wish I could show it to you in person- so you could see it… and smell it.

“Rare pleasure and many surprises are in store for one who has the opportunity of trying the natural dyes. If I were a Navajo woman, I think I should make my blankets of the store dyes as most of them do. But on the days when my imagination soared I should try the various brews generally but rarely tried; and on the days when my ambition was at it’s peak I should try out all the plants in my territory adding this and that as occasion should suggest. Just as weaving suggests new patterns so dyeing suggests new formulas.” P. 37 “Weaving a Navajo Blanket”

I learned so much last week- but there is still so much to learn. I am hopelessly obsessed with natural dying now- so much so that taking a walk on the trail near here- my eyes dart from thing to thing- and I’m asking myself- “Could I dye with that- what color do you think that would make?”….

Wednesday, August 1, 2012

More Adventures in Natural Dyeing - Madder

Illustration from: Prof. Dr. Otto Wilhelm Thomé Flora von Deutschland, Österreich und der Schweiz 1885, Gera, Germany


Madder is native to the Mediterranean, Southeast Europe,Asia Minor,and has been naturalized throughout Europe and the United States. It's a sprawling plant with whorls of leaves similar to sweet woodruff,and tiny yellow flowers. The roots can be harvested after the two or three (some sources said four) growing seasons.
An historically significant dye plant-Egyptian burial wrappings have been found that were dyed with madder. I mentioned last week that I had read that cochineal was used to make the “Red Coats” coats red- well it turns out that madder was used as well.
Madder was also valued for it's medicinal properties and the list of uses is long- it includes...cure for jaundice, inflammations, kidney stones, dysentery,diarrhea, strengthen bones, cure for rickets, and rid the body of worms -not to mention a facial to eliminate freckles.

“In the nineteenth century, dyeing wool or cotton with madder was done in several steps. The textile was first scoured in a mildly alkaline solution, then steeped in oil emulsions, then washed in sheep dung. Next it was rubbed with oak galls, then treated with alum, and only after that dyed with partly fermented roots and root powder of madder. “  p372 Rodale's Illustrated Encyclopedia of Herbs.


I'm thankful those weren't the steps I was going to undertake...Still it seems madder proved to be a little trickier to handle than the other dyestuff in my kit. It would require some gentle coaxing.....

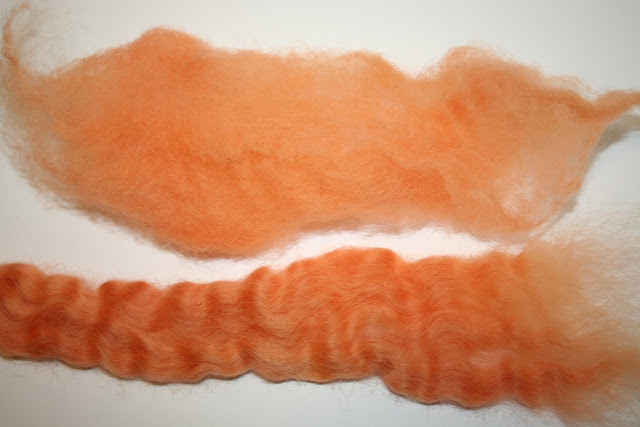
I remember when I purchased my kit Carol edited the instructions to say use 4 tablespoons (as opposed to 3) of alum and no cream of tartar for 1 pound of wool to mordant the wool. I soaked the root powder overnight, noticing that the powder within the muslin bag was resistant to absorbing the soaking water. The next morning I simmered the dye bath for two hours keeping the temperature below 185F. Then poured out the colored water- held it in a bucket- and started a new bath with fresh water which I simmered for another hour. Then the new bath was combined with the first bath. Alum mordanted wool was added and simmered for one hour at 155F. (Van Stralen says higher temps would result in brown) I let it cool and sit overnight. The wool came out of the dye bath much lighter and brighter orange than I anticipated. So I decided to try and simmer it again... still I ended up with a light orange- it didn't change at all. I actually like orange - I was just hoping for a little darker orange.


Van Stralen notes that roots she used to get produced reds- “The madder available nowadays seems to give more orangey colors.” P. 74 - her book was published in 1993. That's intriguing but no explanation is offered- and it sounds pretty mysterious to me...


You might remember that I took on this marathon dyeing project during a week that my husband and son would be away on a cross country road trip. This left the kitchen fully available for all the simmering and cooling going on. Well they surprised me and came home a day earlier than I expected- I really was happy to have them home safe and sound- but there was still some simmering to do...Thankfully they slept most of that Saturday as I finished things up. 


With the light results I got with the madder even after two sessions in the dyebath- I didn't bother with an exhaust bath on this one.


Friday I want to tell you about a wonderful book I read last week and finish up with some notes about what was probably my favorite dyestuff of all that I experimented with.


Monday, July 30, 2012

The Adventures In Natural Dyeing Continue - Logwood and Osage Orange

Picking up where I left off last week with my Natural Dye Sampler kit…

Tab. 69 from Adolphus Ypey, Vervolg ob de Avbeeldingen der artseny-gewassen met derzelver Nederduitsche en Latynsche beschryvingen, Eersde Deel, 1813 published by Kurt Stüber

Logwood dye comes from a tree native to Central America. It’s scientific name haematoxylum actually means blood wood refering to the color of the tree's heart wood. With all my excitement about the cochineal- the logwood in my kit really didn’t stand much of a chance. It’s a much less expensive material and you should be able to get a range of blues, but alas it is not a particularly fast dye.
The directions that came with my kit said “for Dark Blue….” I had some doubts about just how dark a blue you could get since the photos in the Van Stralen book are mostly light blue/purple –having almost a denim blue look.


I set the chips to soak over night. The next morning the water-looked brownish/red not the purple/red VanStralen said was needed. Her directions were to add a teaspoon of washing soda – which I did.


Once simmered the color in the pot was a deep purple/blue-at one point even black,but once the fiber was pulled out I could see the results would be much lighter. Even letting it cool in the pot and rinsing the next day- I still ended up with a pretty light blue/purple/grey. This was also the first batch where I really noticed a mottled look to the result. Latter I realized that I had used wool that had been mordanted with both alum and cream of tartar. The Van Stralen book mentions that cream of tartar will bring out a lavender hue- wish I had noticed that sooner...


wool from the Logwood exhaust bath

Logwood still had some promise in that the next material up was Osage Orange, and I had read that fiber dyed with a logwood exhaust bath then over dyed in Osage Orange would yield a nice green.


Osage Orange…..These trees are native to the United States and were planted extensively in hedgerows as government work projects during the Depression. The wood is used for fence posts and archery bows, and it is thought that placing the large green balls around the house will repel bugs and spiders.
The image above is from a company that markets the fruit for that purpose. You can find it here.


The dye obtained from Osage Orange woodchips provides a fool proof bright yellow that reminds me of the color of lemon curd, and it has a good fastness rating. There was nothing tricky about this one. I simply soaked the dried wood shavings overnight- simmered the bag for an hour – cooled- then simmered the alum mordanted wool in the dye bath for one hour.


(Unfortunately at this stage of the game I was scurrying to keep up with the yarn production and I was a little disappointed with the quality of the yarn itself. If I ever do a marathon dying session like this again I’ll try to have my yarn set to go ahead of time.)

My kit’s instructions called for making green with the Osage Orange over-dyed with indigo. Well- I’m saving the indigo to play with sometime in the future. I did see that you could take wool dyed in the Logwood exhaust bath and re-dip it in Osage Orange. This resulted in a soft herby green that I really like. It seems that this is really how Logwood shines- in combination with other dyes it's fastness is improved Van Stralen explains... She recomends Logwood in tamdem with Goldenrod.


Later this week I’ll share my results with Madder and then finish up my notes on natural dying with some color from the back yard.

Thursday, July 26, 2012

Adventures In Natural Dyeing- Cochineal


Of all the materials in my kit I was most looking forward to dyeing with Cochineal.

Cochineal is a scale insect that is cultivated on prickly pear cacti. It was being used by the Aztecs when the Spanish arrived in Central and South America in the early 1500s.Interesting to note that it was cochineal dye that was used to make the "Red Coats" coats red.The dye fell out of wide spread use as synthetic dyes became readily available in the late 1800s, but there is a renewed interest in it's use today.


Jose Antonio Alzatey Ramirez, 1777- collecting cochineal with a dear tail.Public domain image from Wikipedia

Today it is used widely in the food and cosmetic industries as a non toxic coloring agent, and cultivation has seen a resurgence especially in Peru. It is still a rather pricey material. My 2 ounce bag was $16.20  five years ago- today it would cost $32.00.The price reflects the fact it has to be hand harvested and it takes 70,000  insects to make a pound. Thankfully a little goes a long way.

My kit came with 2 ounces of Cochineal which according to the instructions could dye ½ pound bright red. I was excited to read that the wool wouldn’t require a mordant bath- a little time saver. Cochineal has the reputation of being very stable and fast-in the sense it the color doesn't degrade readily.

I followed Van Stralen’s directions to yield an orangey red. I used an old coffee grinder I’ve been saving just for this purpose- and ground the bugs in small batches.  This was easier than I thought it would be and it didn’t take long to get a fine powder.The bugs look like little chips of micah, once ground the powder looks like paprika.

I put the bugs in a jar with 1 ounce cream of tartar and water to cover and let it sit overnight.I debated about putting the powder in a muslin bag for dyeing, but Van Stralen’s instruction are just to add it to the dye pot and latter to sweep the dye pot clean of any bug debris with some “waste wool”. The powder appeared very fine so I figured it would just dissolve. Well no it didn’t-and even after sweeping the pot with waste wool it was evident the bath would need careful straining to remove the bug bits. So any time saved by not needing a mordant was lost with this tedious procedure. I pressed on knowing it was going to be worth it.


And you know I really do think it is worth it. The color is very rich and even my exhaust bath yielded a rich hue. I even added some of the Wensleydale from the Brazilwood exhaust- remember it was a rusty brown color- it ended up being my favorite- brightening considerably.


I have about a gallon of the dyebath saved in a jug. I know I’ll make use of it. Now I can see how you could really get carried away with experimenting.


 Left-Shetland from first bath,Middle-Wensleydale from 2nd bath,Right- Wensleydale from 2nd bath after ammonia dip.

As an added bonus a simple dip of the hot dyed wool into a bucket of hot water with ¼ cup of ammonia shifted the wool to a pleasing shade of purple.


Cochineal has so much going for it – it’s fast- it’s non-toxic- the colors are vibrant- many shades are possible- it’s a little expensive – but I think well worth it.